Step One
Add Your HubSpot Portal
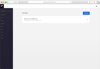
Once you have logged into SR App for the first time. You will be asked to add your HubSpot portal.
Click on the "Add Portal" button and select the portal you wish to install SR App on. You must grant access for Sprocket Rocket to be integrated into your HubSpot portal.
Step Two
Build Your Page
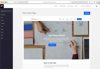
Once your portal has been added, click into the portal and you will be directed to the page builder screen.
On this screen, you can drag and drop modules from the left side panel into the main page builder.
Step Three
Publishing Pages
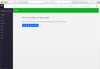
Once you are happy with the modules on your drag and drop page. Add a page name and click the "Add Page" button.
Once completed, your page will be created in your HubSpot portal. You can click on the "Edit Page" to be directed into your HubSpot portal or you can "Add Another Page" using the drag and drop builder.
Adding Pre-Made Page Templates
Add a Pre-Made Page
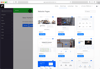
Within the app, there are several pre-made page templates to help save you time and use proven layouts for creating high coverting pages.
Using the navigation, select Website Pages, Landing Pages or Blogs to view the available templates.
When you have found the page you wish to install into your portal, click on "Add Page" and the page will be added to your portal.